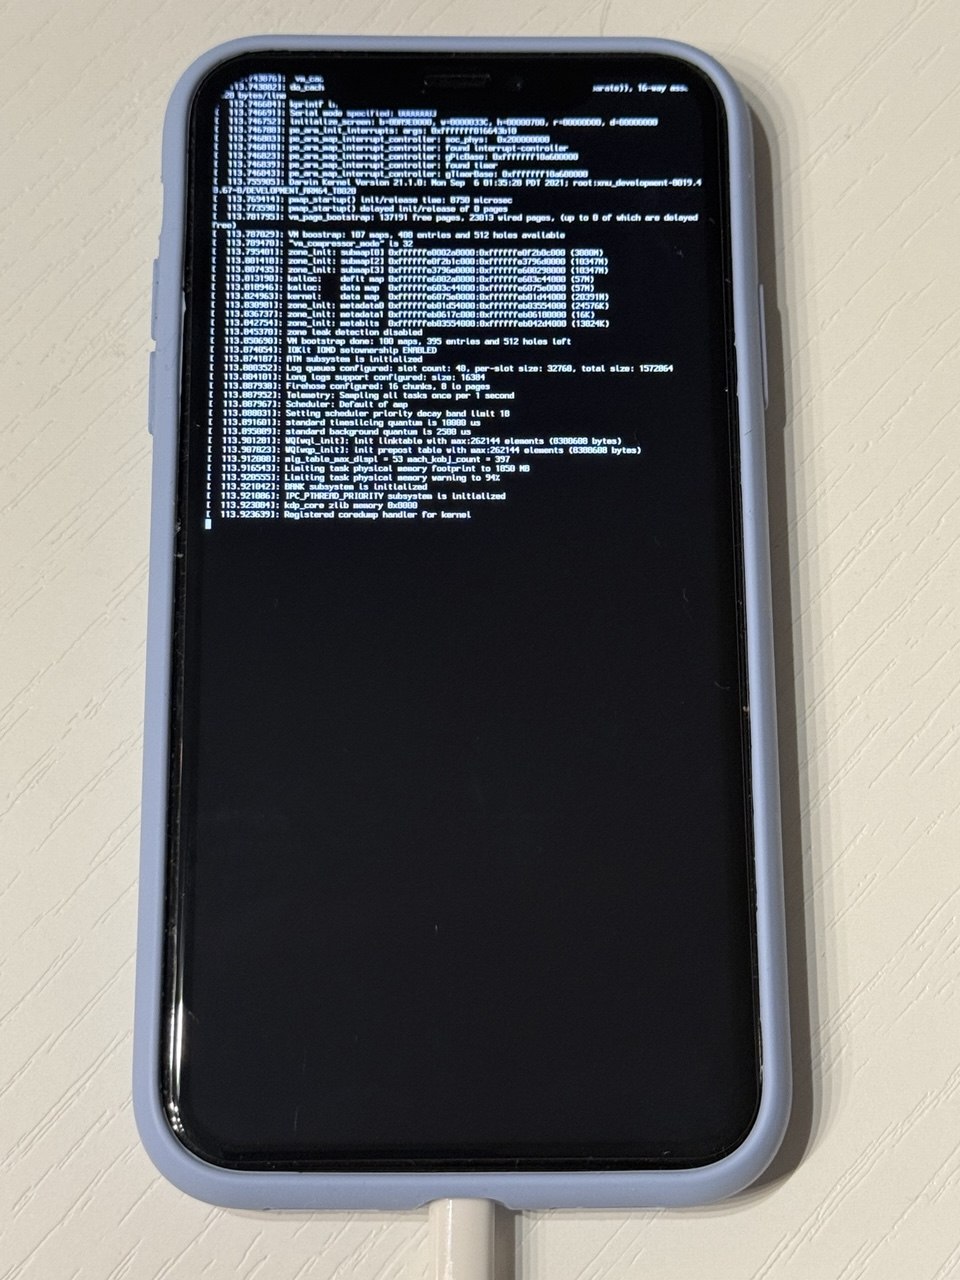
Requirements:
To run the usbliter8 BootROM exploit, you’ll need:
- Raspberry Pi Pico 2 microcontroller board with RP2350 chip
- Micro USB – USB A Cable (to flash BootRom exploit to USB board)
- Lightning to USB-A Cable (to exploit iPhone or iPad with usbliter8 exploit)
- Macbook running macOS 14 or higher.
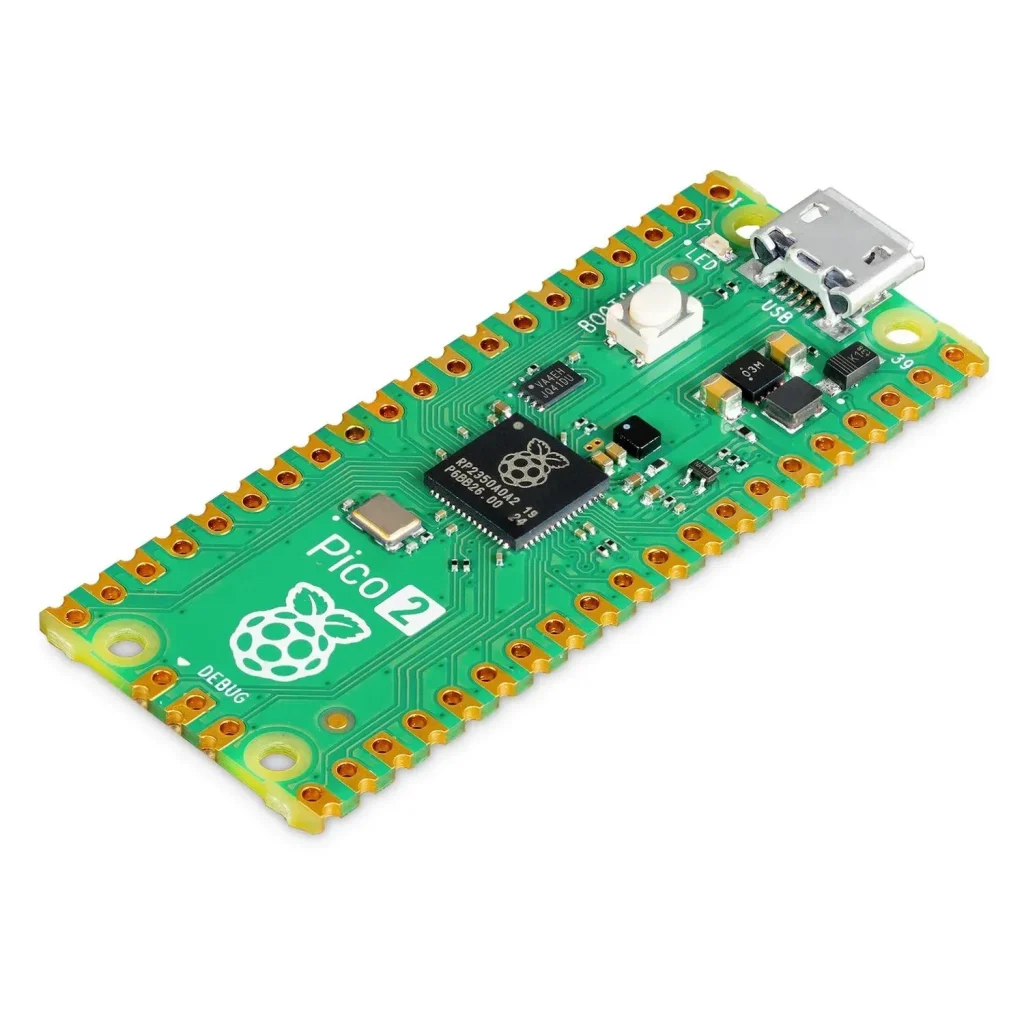
Raspberry Pi Pico 2, RP2350 Microcontroller-Board is used to trigger the exploit during the device’s DFU boot process. Without compatible hardware, usbliter8 cannot currently be executed. For my guide, I will be using Raspberry Pi Pico 2 and Mac OS 14.
Install dependencies:
First, let’s install Homebrew, the package manager for macOS. We’ll use it throughout this guide to install the tools and dependencies required for the usbliter8 exploit. Open Terminal and paste this command.
/bin/bash -c "$(curl -fsSL https://raw.githubusercontent.com/Homebrew/install/HEAD/install.sh)"
Once the brew installation is complete, we can move forward to installing dependencies. Paste the following command into the terminal.
brew install libtool autoconf automake pkg-config libimobiledevice-glue git curl python libusb unzip
If you see the prompt “Do you want to proceed with the installation? [y/n]”, type y to continue the installation.
Now we need a tool called irecovery. It is a command-line utility that communicates directly with Apple devices while they are in Recovery Mode or DFU (Device Firmware Update) mode. It allows you to send commands to the device’s bootloader (iBoot) over USB, making it an essential tool for iOS research, jailbreak development, and low-level device recovery.
What can irecovery do?
Some of its most common uses include:
- Detect devices in Recovery or DFU mode
- Send commands to iBoot
- Upload boot images or other payloads
- Boot custom kernels or ramdisks (when an exploit such as checkm8 or usbliter8 makes this possible)
- Read device information, including ECID and hardware identifiers
- Assist with restore and downgrade workflows
Here is the command to install irecovery to your Mac:
brew install libirecovery
Now it’s time for the most exciting part of this guide—installing the usbliter8 BootROM exploit. In the following steps, we’ll prepare the required hardware, flash the exploit firmware onto the Raspberry Pi Pico 2, and use it to place a supported A12 or A13 device into pwned DFU mode.
Installing usbliter8 and Flashing Raspberry Pi Pico 2
Now we are ready to test usbliter8 exploit. Lets install it to your macOS device. In terminal run this command.
cd ~/Downloads/
git clone https://github.com/prdgmshift/usbliter8.git
cd usbliter8
Due to the way the usbliter8 exploit works, you’ll first need to flash your Raspberry Pi Pico 2 (or another supported RP2350 board) with the usbliter8 firmware which includes BootRom exploit. Precompiled UF2 firmware images are available from the official GitHub Releases page.
Run this command in terminal:
curl -L https://github.com/prdgmshift/usbliter8/releases/download/1.0/usbliter8-v1.0.zip \
-o ~/Downloads/usbliter8/usbliter8-v1.0.zip && \
unzip ~/Downloads/usbliter8/usbliter8-v1.0.zip -d ~/Downloads/usbliter8
Note: Throughout this guide, we’ll be using a Raspberry Pi Pico 2 development board. Therefore, make sure to download the firmware image named usbliter8.pico2.uf2, as this is the firmware we’ll be using in all of the following steps. Your firmware will be located in ~/Downloads/usbliter8/usbliter8.pico2.uf2
Now its time to download picotool binary which is used to flash Raspberry Pi Pico 2 with usbliter8 bootrom exploit.
curl -L https://github.com/raspberrypi/pico-sdk-tools/releases/download/v2.2.0-3/picotool-2.2.0-a4-mac.zip \
-o ~/Downloads/usbliter8/picotool.zip && \
unzip -q ~/Downloads/usbliter8/picotool.zip -d ~/Downloads/usbliter8
After that, the executable will already be located at:
~/Downloads/usbliter8/picotool/picotool
You can test it with:
~/Downloads/usbliter8/picotool/picotool version
Flash the usbliter8 exploit
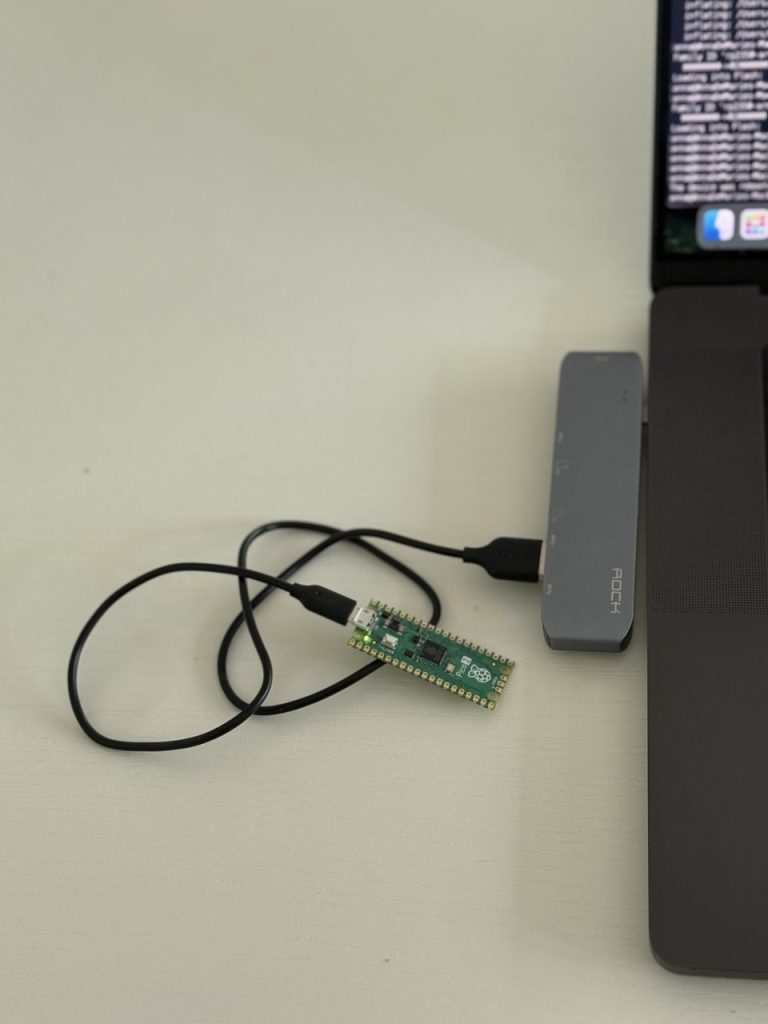
Now it’s time to flash the usbliter8 exploit onto your Raspberry Pi Pico 2. First, put the Pico 2 into BOOTSEL mode by holding the BOOTSEL button while connecting it to your Mac via USB. Once the board is detected, run the following command to flash the firmware. In my case I just pushed the BOOTSEL button on Pico2 and waited for 5 seconds
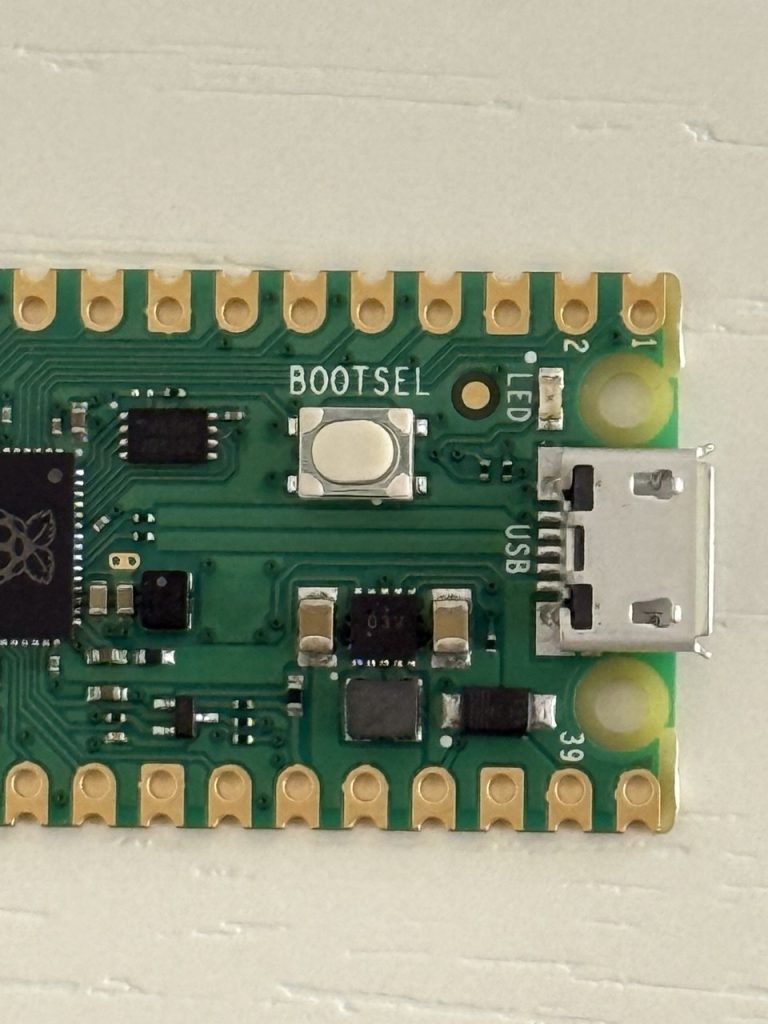
Now run this command to upload usbliter8 exploit to your microcontroller.
~/Downloads/usbliter8/picotool/picotool load ~/Downloads/usbliter8/usbliter8.pico2.uf2
If the flashing process completes successfully, you should see the following message:
Loading into Flash: [==============================] 100%
This indicates that the usbliter8 firmware has been successfully written to your Raspberry Pi Pico 2.

You can now reboot the board by running:
~/Downloads/usbliter8/picotool/picotool reboot

After rebooting, your Raspberry Pi Pico 2 will be running the usbliter8 firmware and will be ready to trigger the BootROM exploit on supported Apple devices.
Exploiting an A12 / A13 Device
Once your Raspberry Pi Pico 2 is running the usbliter8 firmware, you’re ready to exploit a supported Apple device.
Step 1: Enter DFU Mode
Connect your A12 or A13 device to your Mac or PC and place it into DFU (Device Firmware Update) mode.
Enter DFU Mode on your A12 / A13 iPhone or iPad
Before running the usbliter8 exploit, you must place your device into DFU (Device Firmware Update) mode.
iPhones
- Connect your iPhone to your Mac or PC and open Finder (macOS) or iTunes (Windows/macOS Mojave and earlier).
- Press and quickly release the Volume Up button.
- Press and quickly release the Volume Down button.
- Press and hold the Side (Power) button until the screen turns black.
- As soon as the screen goes black, press and hold the Volume Down button while continuing to hold the Side button for 5 seconds.
- Release the Side button, but keep holding the Volume Down button for another 10 seconds.
If the display remains completely black, your iPhone has successfully entered DFU mode. Finder or iTunes should detect a device that needs to be restored.
iPad Models Without a Home Button
- Connect your iPad to your Mac or PC and open Finder or iTunes.
- Press and quickly release the Volume Up button.
- Press and quickly release the Volume Down button.
- Press and hold the Top (Power) button until the screen turns black.
- Immediately press and hold the Volume Down button while continuing to hold the Top button for 5 seconds.
- Release the Top button, but continue holding the Volume Down button for approximately 10 seconds.
If the screen stays completely black, your device is in DFU mode and ready for the next step. Disconnect it from your Mac.
Step 2: Connecting the Pico 2 to a Lightning Cable
Unfortunately, the Raspberry Pi Pico 2 (RP2350) must be soldered to a USB-A to Lightning cable in order to connect to the target Apple device in DFU mode. Take a USB-A to Lightning cable and cut off the USB-A connector. Inside the cable you will find four wires (the colors may vary depending on the manufacturer). But usually VBUS is red and Ground is black.
Solder the wires to the Raspberry Pi Pico 2 as follows:
- Red → VBUS (5V Power)
- Black → GND (Ground)
- Blue → GP12 (USB D+)
- White → GP13 (USB D−)
Note: The wire colors shown above match the cable used in this guide. Your cable may use different colors, so verify the wiring with a multimeter before soldering. I am not responsible for any device or Pico damage. Check official Raspberry Pi Pinout diagram.
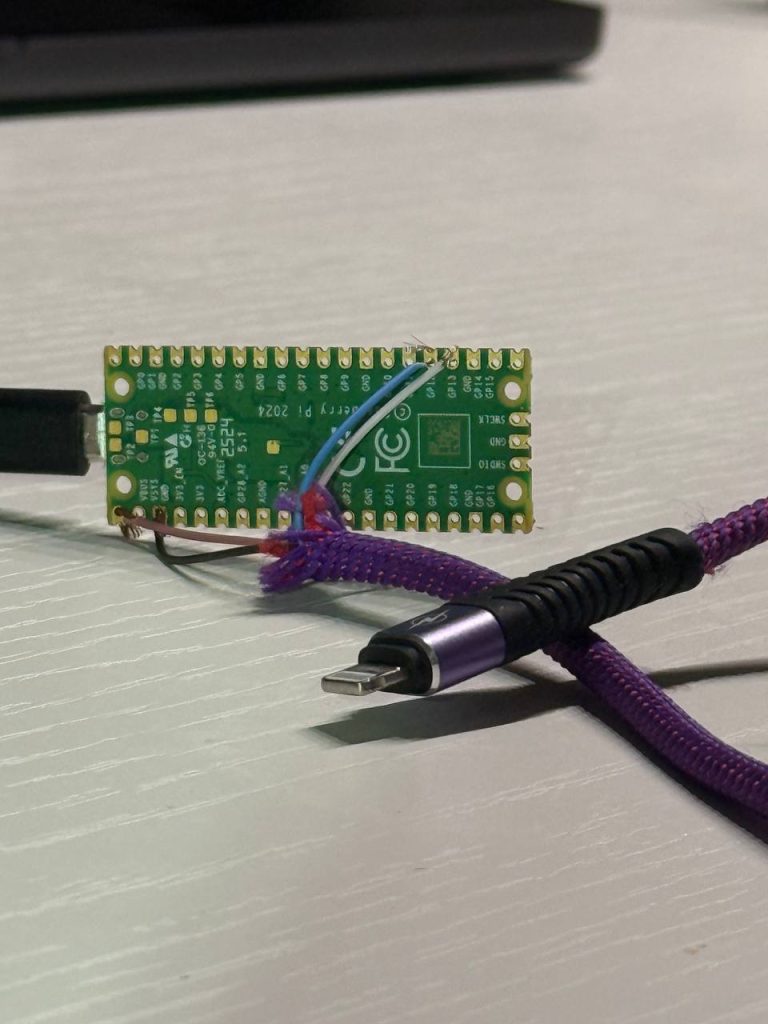
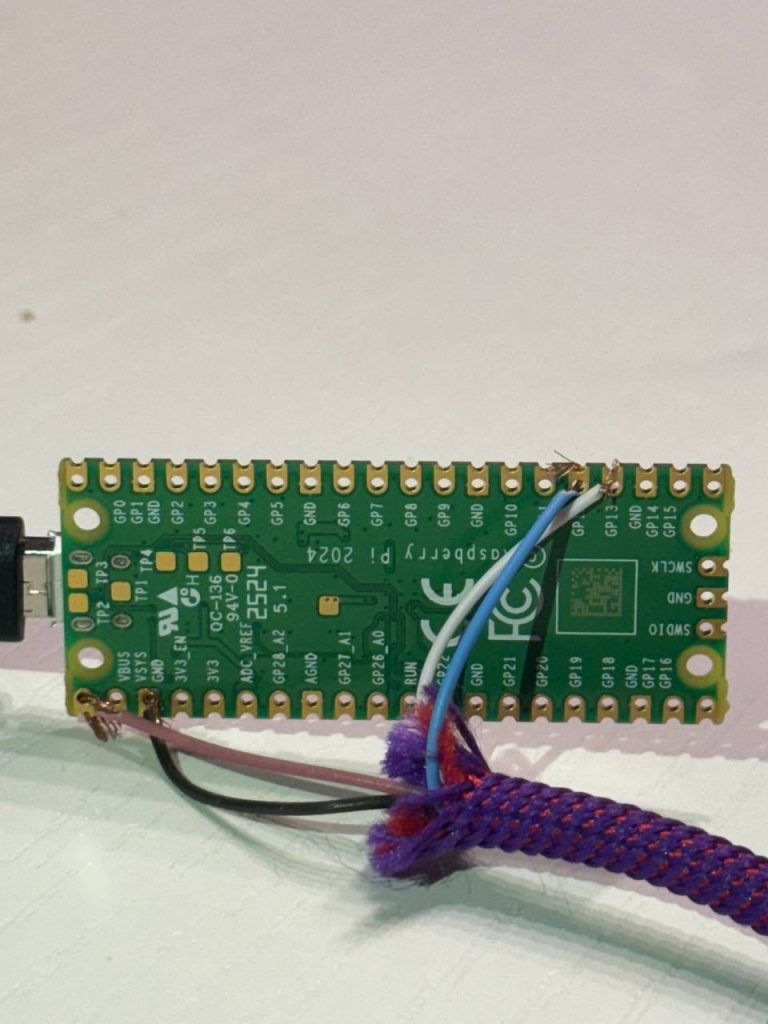
Once the soldering is complete, you are ready to run the exploit. The RP2350 board appears as a virtual COM/serial port, which allows you to view detailed exploit logs from your computer.
Please follow the next steps carefully and exactly as described below.
1. Connect the Raspberry Pi Pico 2 to your Mac using the soldered USB-A to Lightning cable. Do NOT connect the Apple device in DFU mode yet.
2. Run the following command to identify the Pico 2’s virtual serial (COM) port:
ls /dev/cu.usbmodem*
The command output will be the Pico 2 Serial port address: like /dev/cu.usbmodem11201. Once you have identified the serial port, run the following command to open a serial connection and monitor the exploit logs:

screen /dev/cu.usbmodem11201
At this point, you should not see any output in the terminal. This is expected. The exploit will begin printing log messages only after the target Apple device is connected in DFU mode.
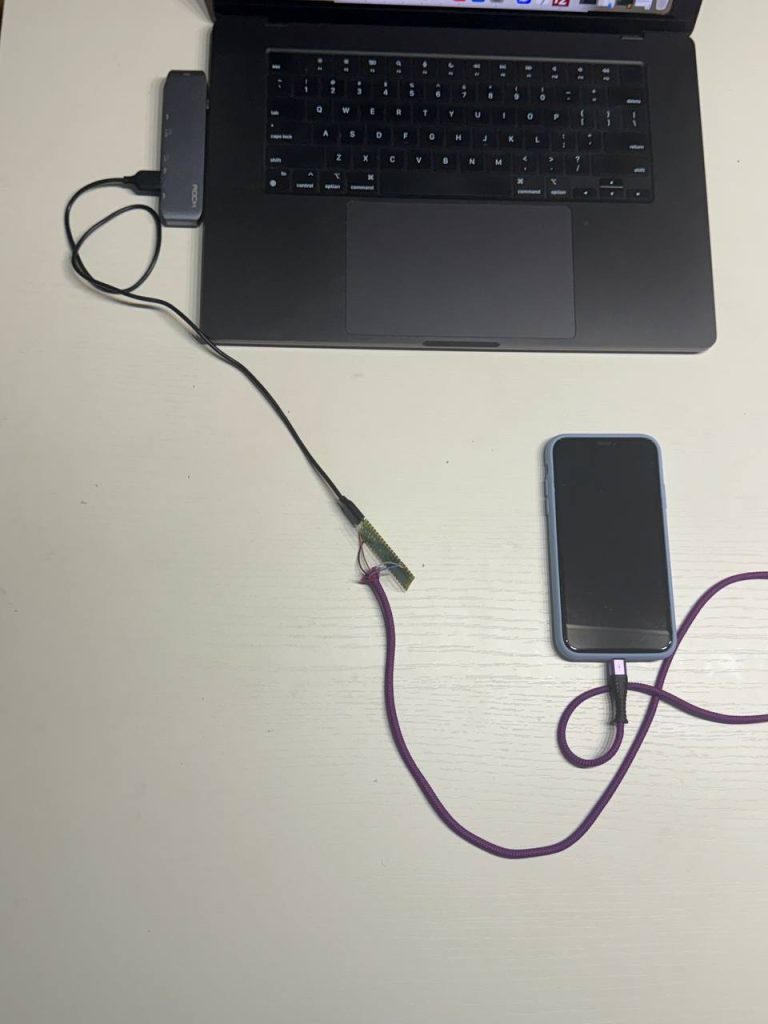
Step 3: Running the usbliter8 exploit
Now connect your A12 or A13 Apple device, already in DFU mode, to the Lightning connector of the cable. Watch the terminal window carefully. Within a few seconds, you should see the BootROM exploit begin executing, along with detailed status messages printed by the RP2350 firmware. If the exploit completes successfully, the logs will indicate that the device has entered a pwned DFU state.
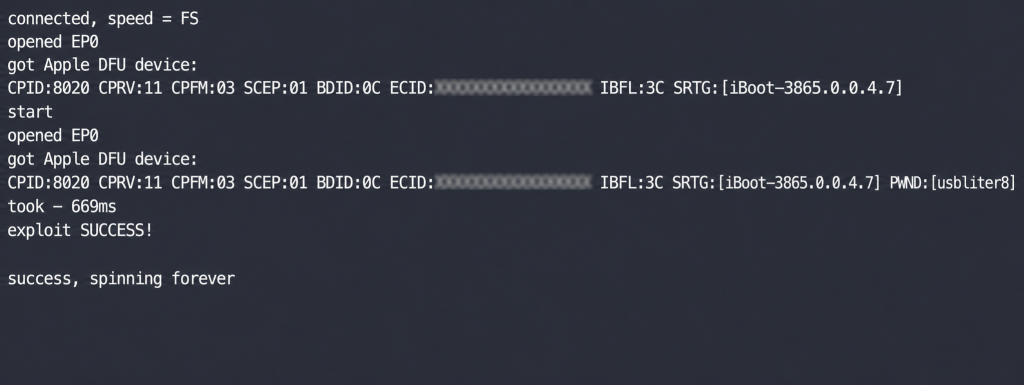
The exploit will begin automatically and typically completes within 669ms. You will see presence of PWN:[usbliter8] mode confirms that the device has been successfully exploited and is now running in pwned DFU mode. After the exploit completes successfully, disconnect the Apple device from the Raspberry Pi Pico 2 and reconnect it to your Mac or PC. At this point, you can begin loading custom boot components, booting a custom ramdisk, or continue your security research using the usbliter8 BootROM exploit.
Reboot the Raspberry Pi Pico 2 Board
After each exploit attempt—whether it succeeds or fails—the RP2350 board must be restarted before it can be used again.
You can reboot it in one of three ways:
- Press the board’s RESET button.
- Reboot it using picotool:
~/Downloads/usbliter8/picotool/picotool reboot
- Or simply disconnect and reconnect the board’s USB power.
Once the board has rebooted and returned to the Ready state, it is prepared to exploit another supported A12 or A13 device. In the nex article I will show you how to boot custom SSH ramdisk to your A12, A13 device using usbliter8.